



Key Takeaway: What Should You Check in a PTE Booking Confirmation?
Start with the candidate’s complete name. Our automated system uses the name already saved in the candidate’s myPTE account. It does not type or change the name during booking. Before booking, make sure the name in myPTE exactly matches the Passport ID that the candidate will carry on exam day.
Next, check the exact PTE test type. PTE Academic, PTE Academic UKVI and PTE Core are different tests. A confirmed appointment for the wrong test does not help with your university, visa or immigration requirement.
Then check the appointment itself:
- Test-centre name.
- Full location or address.
- Exam date.
- Exam time.
- Appointment or booking reference.
Finally, sign in to the candidate’s myPTE account and make sure the appointment appears there. Pearson also tells test takers to use the myPTE dashboard to check booking confirmation, including the time and date.
Everything correct? Save the confirmation and begin planning for exam day.
Something wrong? Do not ignore it. Contact us through the verified support channel and show us the confirmation. Tell us exactly which detail needs attention.
Now let us look at why each check matters.

Your PTE booking confirmation arrives.
Excellent. The exam is booked. You can finally stop checking the calendar every ten minutes.
But before you close WhatsApp and return to preparation, take two minutes to read the confirmation properly.
A confirmation is not only proof that a booking exists. It tells you who is taking the test, which PTE test they are taking, where they must go, and when they must arrive. One wrong detail can create a much bigger problem on exam day.
Do not worry. You do not need to inspect every line like a detective.
You only need to check seven important details:
- Candidate name.
- PTE test type.
- Test-centre name.
- Test-centre location.
- Exam date.
- Exam time.
- Appointment or booking reference.
In this guide, we will check each one together. We will also explain the difference between the review message we send before booking and the final confirmation you receive after booking.
If you have not booked yet, you can start through our automated PTE exam-booking process. Once your required details are ready, our 24/7 automated process can complete the booking journey in about 60 seconds.
Is the Review Message the Same as the Final Booking Confirmation?
No. These are two different stages in our booking process.
After you pay for an exam-booking package and submit the booking form, we send a short review message through WhatsApp. It shows these details:
- Username/Email.
- Test Center.
- Location.
- Exam Date.
- Exam Time.

Read those details before clicking “Details are correct.” Our automated system continues only after you approve them.
The final booking confirmation comes after the appointment is completed. This is the record you save for exam day. It includes the confirmed candidate and appointment information.
Think of the difference like this:
- Review message: “Are these the details you want us to use?”
- Final confirmation: “Your appointment has been completed with these details.”
The review step helps stop an incorrect centre, date or time before booking. The final check proves that the completed appointment matches what you approved.
Please check both.
It takes less time than finding the right passport pocket later.
Why Should You Check the Confirmation Immediately?
Because an error is easier to handle when you find it early.
Imagine receiving the confirmation today but opening it properly one day before the exam. You then notice that the centre is in another part of the city, the time is earlier than expected or the booked test type is not the one you need.

Now the problem feels urgent.
Open the confirmation as soon as it arrives. Compare it with:
- The candidate’s Passport ID.
- The PTE test required for the candidate’s goal.
- The centre, date and time approved in WhatsApp.
- The appointment shown inside the candidate’s myPTE account.
This check also protects you from fake or incomplete booking claims. A genuine completed booking does not end with a seller saying, “Done.” You receive confirmation, and the appointment can be checked in the candidate’s own myPTE account.
Now let us check the seven details one by one.
1. Does the Candidate Name Match the Passport ID?
Check the candidate’s complete name first.
Compare every part:
- Given name.
- Middle name, when present.
- Surname.
- Spelling.
- Order of the names where relevant.

Do not compare the confirmation with a nickname, social-media name or the short name used by friends.
For example, if the passport says Rohan Mahesh Patel, a booking that only shows Rohan Patel needs attention. Do not decide that the missing middle name is “close enough.”
Pearson’s current identification policy says the personal details used for booking must match the candidate’s ID. The official policy is the final source for accepted identification and matching rules.
What if you booked for another person?
Use the test taker’s myPTE account information, not the payer’s details.
The person who pays and the person who takes the exam can be different. Our system uses the name saved in the test taker’s myPTE account, so ask the candidate to compare that account name with their own Passport ID before you start the booking.
After booking, compare the name on the confirmation with the same Passport ID. Do not approve it only because the first name looks familiar.
What if the name is wrong?
Do not wait until exam day.
2. Is the Correct PTE Test Type Booked?
Now check the PTE test type.
This sounds obvious, but the names are similar:
- PTE Academic.
- PTE Academic UKVI.
- PTE Core.
They are not three spellings of the same booking.
Your university, visa route or immigration program decides which test you need. The confirmation must show that exact test.

For example, do not assume that a PTE Academic booking automatically meets a requirement that specifically asks for PTE Academic UKVI. Do not select PTE Core because the word “Core” sounds suitable for general English.
The safest check is simple:
- Open the official requirement from the university, visa authority or immigration program.
- Read the exact PTE test name.
- Compare that name with the booking confirmation.
Do this before you plan travel or begin test-specific preparation.
Why can this mistake happen?
Students often search for a date under one test and later choose another test in a hurry. The names sit close together, and the booking can feel like one long set of similar screens.
Our form asks you to select the PTE test type. Check it before submission, then make sure the final confirmation matches it.
If the test type is wrong, contact us immediately. Do not assume the test centre can simply change it when you arrive.
3. Is the Test-Centre Name Correct?
Check the complete test-centre name.
One city can have more than one PTE test centre. Choosing the correct city does not automatically mean you chose the correct centre.
Suppose you searched for Ahmedabad and saw several centres. You preferred one because it was easier to reach. If the confirmation shows another centre in Ahmedabad, the city is correct but the appointment is not the one you expected.

Compare the centre name with the one you approved in our WhatsApp review message.
Look for:
- The official centre name.
- Any branch or area mentioned with the name.
- The city.
- The address shown with the appointment.
Do not rely on a short name saved in your memory. Two centre names can look almost the same.
Why does the exact centre matter?
Because the confirmation controls where the candidate must report.
Arriving at another PTE centre in the same city does not move the appointment there. The candidate must go to the centre shown in the confirmed booking.
Save the centre name in your calendar exactly as written. When exam day gets closer, use that name with the full address to plan the route.
4. Does the Test-Centre Location Match the Centre?
The centre name and centre location are connected, but check both.
The name tells you which centre is booked. The location tells you where that centre is.
Read the complete address or location shown in the confirmation. Check the area, city and any building information provided.
Then search for the location before exam day. Do not wait until you are standing outside with ten minutes left and three buildings using similar names.

What should you save?
Keep:
- The complete centre address.
- A map link or saved location.
- The expected travel time.
- The centre name as written in the confirmation.
If you plan to use a taxi or ride app, search the full centre name and compare the result with the address. Do not select the first similar result without checking it.
What if the location looks different from your choice?
Compare it with the centre shown in the review message and the appointment in myPTE.
Sometimes a centre is known by an area name while the official address uses a building or business name. That alone does not prove an error. Match the complete centre information before deciding.
If the confirmed location belongs to a different centre, contact us with the appointment reference and a screenshot that hides sensitive account information.
5. Is the Exam Date Correct?
Check the full exam date, including the year.
Yes, the year too.
Most date mistakes happen because the reader sees the expected day number and moves on. A date such as 08/09/2026 can also be read differently when one system uses day-month-year and another uses month-day-year.
Read the month in words when possible.
Instead of thinking “08/09,” say:
My exam is on 8 September 2026.
Then compare it with:
- The date you selected.
- The date shown in our review message.
- The date in the final confirmation.
- The date on the myPTE dashboard.
All four should point to the same appointment.

What if your first-choice slot was unavailable?
Our booking form asks you to choose what we should do if the exact slot is no longer available.
You select one of two instructions:
- Book any slot after 30 days so that I can reschedule it on my own (for free).
- Ask me for another slot details.
If you selected the first instruction and your original slot was unavailable, the confirmed date can be an available appointment after 30 days from the date you requested. Read the final confirmation carefully instead of expecting the original date automatically.
If you selected “Ask me for another slot details,” we send the same booking-form link again through WhatsApp. You update the slot details before the process continues.
The key point is simple: read the date that was actually confirmed.
6. Is the Exam Time Correct?
Date and time belong together. Do not check one and assume the other is correct.
Read the exam time slowly. Look for AM, PM or the 24-hour format.
For example:
- 08:00 means 8:00 in the morning.
- 14:00 means 2:00 in the afternoon.
- 18:30 means 6:30 in the evening.
Now check whether the confirmation shows the start time, reporting time or both.

Do not plan to walk through the test-centre door at the exact exam start time. Read the instructions included with the booking and arrive at the required reporting time.
Why do students misread the time?
The most common reasons are simple:
- Reading 14:00 as 4:00 instead of 2:00.
- Missing AM or PM.
- Remembering the time from an earlier availability search instead of the completed booking.
- Looking at a screenshot from another appointment.
Add the confirmed time to your phone calendar immediately. Write the centre address in the same calendar entry.
Set one reminder for the day before and another early enough on exam day. A calendar reminder cannot improve your English score, but it can stop a very avoidable morning panic.
7. Can You Find the Appointment or Booking Reference?
The appointment reference is the number or code connected to the completed booking.
Save it.
You need a clear reference when asking about a specific appointment. It helps separate your booking from another order, payment or test attempt.
Keep the reference with:
- The final confirmation.
- The payment or order record.
- The booking invoice.
- The candidate’s myPTE account information.
Do not share the full reference publicly. A blurred screenshot is fine for a general discussion, but support needs the complete information through a verified private channel.

Is a payment reference the same as an appointment reference?
No.
A payment reference identifies a transaction. An appointment reference identifies the exam booking.
Both are useful, but they prove different steps.
If money was paid but no appointment appears in myPTE, a payment reference alone does not prove that the exam is booked. The final appointment confirmation and the myPTE dashboard are the important booking checks.
How Do You Confirm the Booking in myPTE?
After checking the WhatsApp confirmation we send, sign in to the candidate’s own myPTE account.
Look for the booked appointment on the dashboard. Check the date and time there. Compare the appointment with the confirmation you saved.
Pearson’s booking and test-management help page explains that candidates can check booking confirmation in their myPTE dashboard.
This step matters because it gives you a second check inside the candidate’s official account.
Your finished check looks like this:
- We sent the completed booking confirmation through WhatsApp.
- The candidate and appointment details are correct.
- The appointment appears in the candidate’s myPTE account.
- The centre, date and time match in both places.
Once all four statements are true, save the records and move to preparation.

What if the WhatsApp message arrived but no appointment appears in myPTE?
Do not create another booking immediately.
First, refresh the myPTE dashboard and confirm that you signed in to the correct candidate account. Then contact us with the registered mobile number, order reference and confirmation details.
We can check the booking connected to your order.
Starting a second booking before checking the first one can leave you with two payments or two appointments. One problem is enough for one afternoon.
What Should You Do If One Detail Is Wrong?
Stop and report the exact problem.
Do not send a message that only says, “Booking wrong.”
Tell us:
- The registered mobile number.
- The order reference.
- The appointment reference, when available.
- Which field is wrong.
- What the field currently shows.
- What you expected it to show.
For example:
The confirmation shows 18 August at 2:00 PM. I approved 19 August at 2:00 PM. Please check the exam date.
That message is easy to understand and easy to investigate.

Should you change the booking yourself immediately?
First check what happened and which appointment is active.
Do not cancel, reschedule or pay again only because one message looks unfamiliar. Confirm the active appointment in myPTE and contact us before taking another paid action.
If the appointment needs a cancellation or rescheduling decision, read our latest Refund and Cancellation Policy and the current official Pearson rules. Timelines and terms can change, so the live policy pages are the final reference.
What if the candidate name is wrong?
Treat an identity mismatch as urgent.
Do not wait and hope the test centre ignores it.
What If You Do Not Receive the Booking Confirmation?
First, check whether you completed the review step.
Our automated booking does not continue until you click “Details are correct” after checking the details in WhatsApp.

If you approved the details but no final confirmation arrived:
- Check the registered WhatsApp number.
- Confirm that the phone has an active internet connection.
- Open the candidate’s myPTE dashboard and look for the appointment.
- Find the PTENOTE order confirmation or booking invoice in WhatsApp or email.
- Contact us with the registered details and order reference.
Do not pay again only because the message is delayed.
If money was deducted but we did not receive the payment, the bank returns the amount to the original account after completing its reversal process. Send us the transaction reference so we can verify whether the order reached us before you try another payment.
This keeps one unclear transaction from becoming two unclear transactions.
How Can You Tell Whether a PTE Booking Is Genuine?
A genuine booking gives you something you can verify.
Do not rely only on a screenshot sent by an unknown seller. A screenshot can be edited, cropped or taken from another booking.
Check that:
- The payment was made to the same verified business responsible for the booking.
- You received an order record and GST invoice.
- The final confirmation contains the candidate and appointment information.
- The appointment appears in the candidate’s own myPTE account.
- You have a real support channel for questions about the order.

Pearson’s booking safety guidance also tells students to use a booking they can verify in their own myPTE account.
We keep your enquiry, payment, form, approval and booking connected under one service. Our automated system handles the booking after you approve the details, and our support remains available when a payment, form or confirmation problem needs attention.
That is what a trustworthy process should feel like: clear before payment, clear during booking and easy to verify after completion.
What Records Should You Save After Booking?
Create one folder on your phone or computer for the exam.
Save:
- The final booking confirmation.
- The appointment reference.
- The PTENOTE payment or order confirmation.
- The booking invoice with GST.
- A screenshot of the appointment in myPTE.
- The current centre address.
- Any later rescheduling or cancellation confirmation.

Use a simple folder name such as:
PTE Booking – Candidate Name – Exam Date
Do not store the candidate’s password in an open screenshot or share private account information in a public chat.
Keeping these records together helps when:
- You need to confirm the centre address.
- You contact support.
- You reschedule or cancel under the current rules.
- You book another attempt later.
- You need the invoice for your records.
This takes five minutes now and saves a long search later.
What Should You Check Again One Day Before the Exam?

Open the confirmation once more the day before the test.
Check:
- Candidate name.
- Test type.
- Centre name.
- Centre address.
- Exam date.
- Exam time and reporting instruction.
- Appointment reference.
Then check the practical items:
- The Passport ID is valid and ready.
- The route to the centre is saved.
- The alarm is set.
- The candidate knows when to leave.
- The appointment still appears in myPTE.
This is not about doubting the booking. It is about beginning exam day calmly.
Common PTE Confirmation Mistakes to Avoid
Checking only the date

The date can be correct while the centre or time is wrong. Check the full appointment.
Reading the city but not the centre

One city can have several centres. Read the complete centre name and address.
Ignoring the PTE test type

PTE Academic, PTE Academic UKVI and PTE Core are different. Match the test to the official requirement.
Comparing the name with a nickname
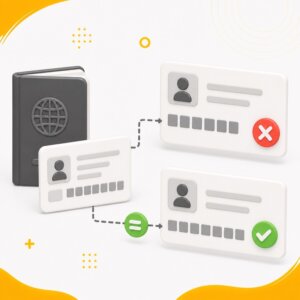
Our system uses the name saved in the candidate’s myPTE account. Compare that account name with the Passport ID, not a nickname or the name used in daily conversation.
Treating payment as proof of booking

Payment and appointment confirmation are separate records. Check the completed booking and myPTE dashboard.
Saving only a cropped screenshot
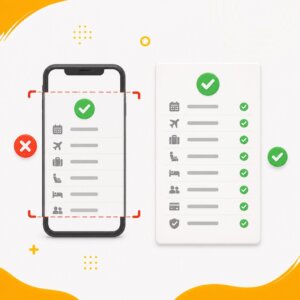
A crop can hide the date, centre or reference you need later. Keep the complete confirmation in a private folder.
Waiting until exam day to report an error

Open the confirmation immediately. Early checks give you more time to understand and correct a problem.
Frequently Asked Questions
How do I know that my PTE exam is fully booked?
You receive the completed booking confirmation through WhatsApp, and the appointment appears in the candidate’s myPTE account. Check that the candidate, test, centre, date and time match.
What details appear in the PTENOTE review message before booking?
The review message shows Username/Email, Test Center, Location, Exam Date and Exam Time. Click “Details are correct” only after checking all details.
What are the seven details I should check after booking?
Check the candidate name, PTE test type, test-centre name, test-centre location, exam date, exam time and appointment or booking reference.
Where can I see my PTE booking confirmation?
We send the completed confirmation through WhatsApp. You can also sign in to the candidate’s myPTE account and check the appointment on the dashboard.
What if my name does not match my passport?
Our automated system uses the name saved in your myPTE account. If it does not match your Passport ID, follow Pearson’s current account-support process to correct it before booking. If the exam is already booked, contact us immediately and follow Pearson’s current identification guidance.
Is a payment receipt enough to prove that the exam is booked?
No. A payment receipt proves a payment attempt or completed transaction. A booking confirmation and the appointment inside myPTE prove the exam appointment.
Should I save the booking reference?
Yes. Keep it with the full confirmation, order record and GST booking invoice. It helps identify the exact appointment when you need support.
What if the confirmation has the correct city but the wrong centre?
Contact us immediately. Several centres can operate in one city, so the exact centre name and address must match the appointment you approved.
Can I check the booking without using a screenshot?
Yes. Sign in to the candidate’s myPTE account and check the appointment on the dashboard. This is an important way to verify the completed booking.
Conclusion: Your Booking Is Confirmed. Now Make Sure It Is Correct.
Receiving the confirmation is the finish line for the booking process, but give it one final check before moving on.
Read these seven details:
- Candidate name.
- PTE test type.
- Test-centre name.
- Test-centre location.
- Exam date.
- Exam time.
- Appointment reference.
Compare the name saved in the candidate’s myPTE account with the Passport ID. Our system uses that account name during booking and does not replace it. Then compare the appointment with what you approved and make sure the booking appears in myPTE.
Everything correct? Save the records, set a reminder and focus on preparation. Start your PTE Exam preparation with our PTE Mock Test.
Something wrong? Tell us immediately and identify the exact field. Do not wait until exam day, and do not create another booking before the first appointment has been checked.
Want us to handle the booking journey? Start with our PTE exam-booking form, choose the suitable live package and complete the WhatsApp verification. Once you approve the details, our 24/7 automated system completes the booking in 60 seconds only and sends the confirmation.
Fast is useful.
Fast, correct and easy to verify is much better.
References and Useful Resources
Use these official pages when you need to check your booking, identification requirements or appointment rules:
- Pearson PTE Identification Policy – Check the current Passport ID and candidate-name requirements.
- Pearson PTE Booking Safety Guidance – Learn how to verify your booking and avoid unsafe sellers.
- Pearson PTE Cancellation and Rescheduling Policy – Check the latest rules before changing or cancelling an appointment.
- PTENOTE PTE Exam Booking – Use our 24/7 automated process to complete your PTE exam booking in 60 seconds.
- PTENOTE Refund and Cancellation Policy – Read the latest terms that apply to your PTENOTE order.
- PTENOTE PTE Mock Tests – Start preparing after checking your booking confirmation.
Always use the latest information shown on the official policy and service pages because requirements and terms can change.